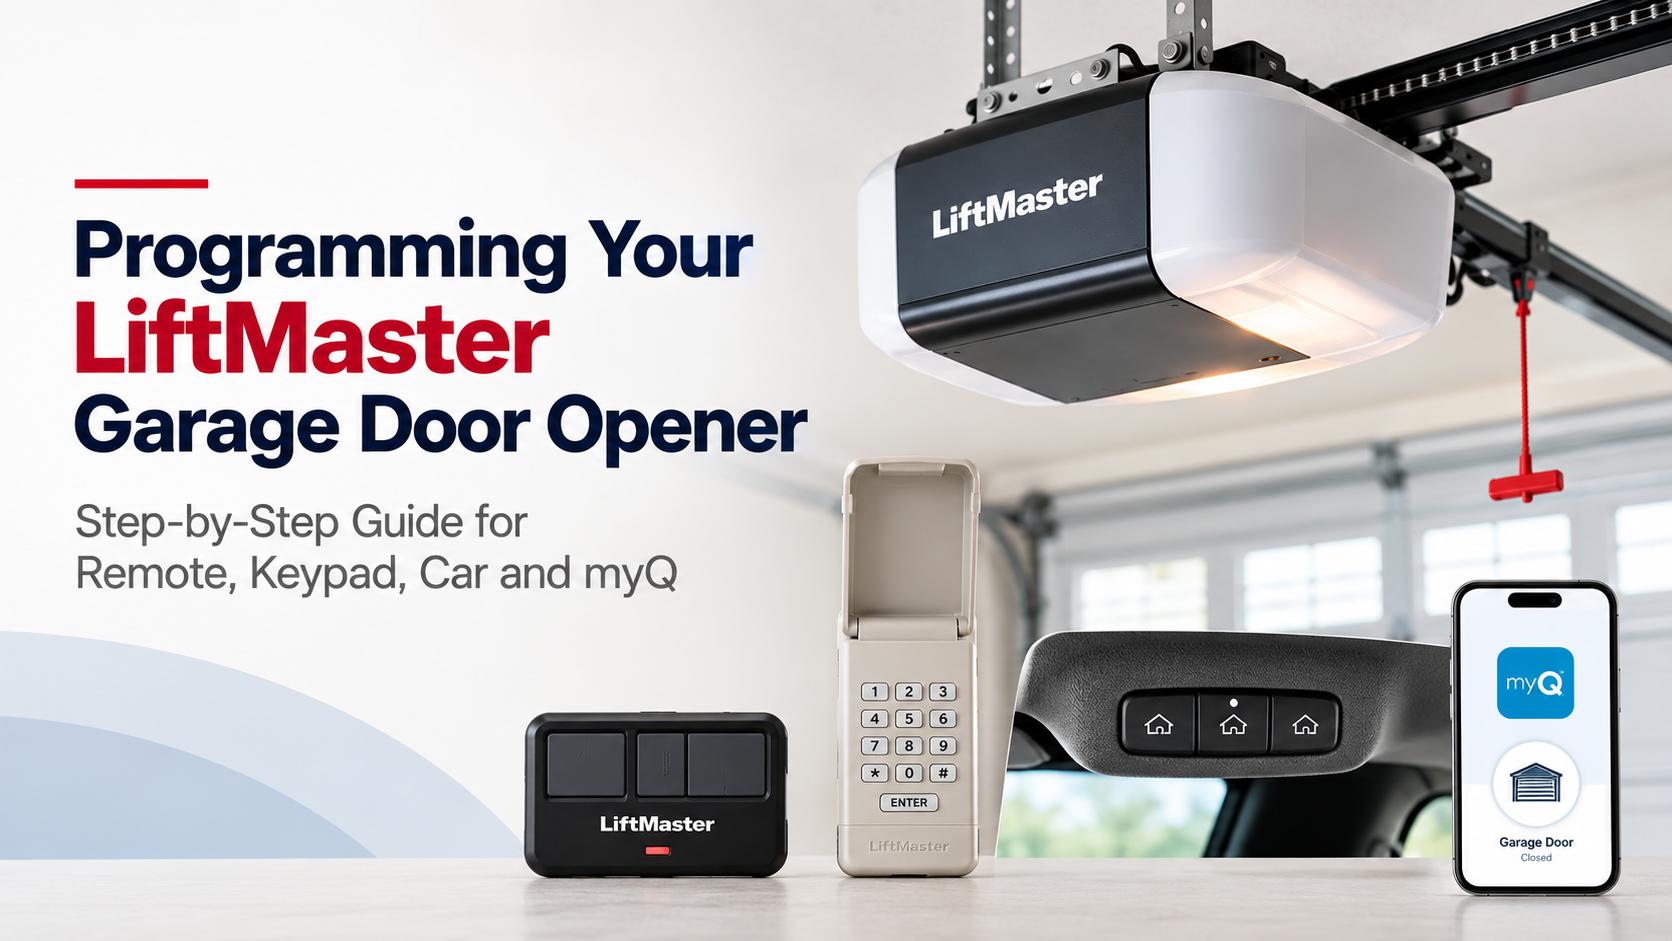
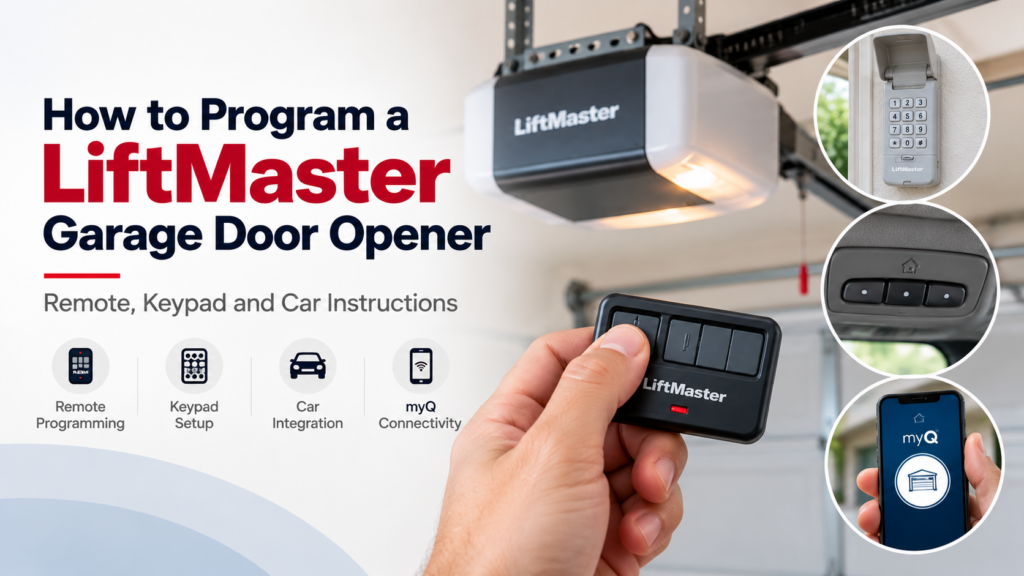
Programming a LiftMaster garage door opener allows you to operate your garage door using a handheld remote, wireless keypad, compatible vehicle buttons, or supported smart-home controls.
The process is usually straightforward, but the correct procedure depends on the model of your opener, the remote or keypad you own, and the technology they use. A programming sequence that works for one remote may not work for another, even if both are manufactured by LiftMaster.
This guide explains how to program a LiftMaster garage door opener, including remote pairing, keypad PIN setup, Learn-button operation, vehicle controls, and myQ connectivity. It also covers the problems that can prevent programming from completing successfully.
Quick answer: For many compatible LiftMaster remotes, you press and immediately release the opener’s LEARN button, then press and hold the desired remote button within the programming window until the opener lights flash or you hear two clicks. However, some remotes, including certain MAX models, require additional steps before pairing. Always follow the instructions for your exact model.
For the official compatibility information, visit the LiftMaster Remote and Keypad Compatibility Guide.
Before You Begin: Identify Your LiftMaster Opener and Remote
Before starting LiftMaster remote programming, identify the opener and accessory models. This prevents compatibility problems and unnecessary attempts at pairing.
1. Find the garage door opener model number
The model number is usually printed on a product label attached to the motor unit. Depending on the design, the label may be on the side, back, or another accessible area of the housing.
Record the model number and, if necessary, consult its official owner’s manual. The model number is more reliable than the appearance of the motor housing alone.
2. Identify the remote or keypad model
Look for the model number printed on the rear of your remote or keypad. Some remotes have a label beneath the visor clip or battery cover.
Different accessories can use different programming sequences. For example, older MAX remotes such as the 890MAX, 893MAX, and 895MAX have a model-specific sequence that includes selecting a programming mode before pairing with the opener.
The official LiftMaster Remote Control Programming Overview links to model-specific guides and manuals.
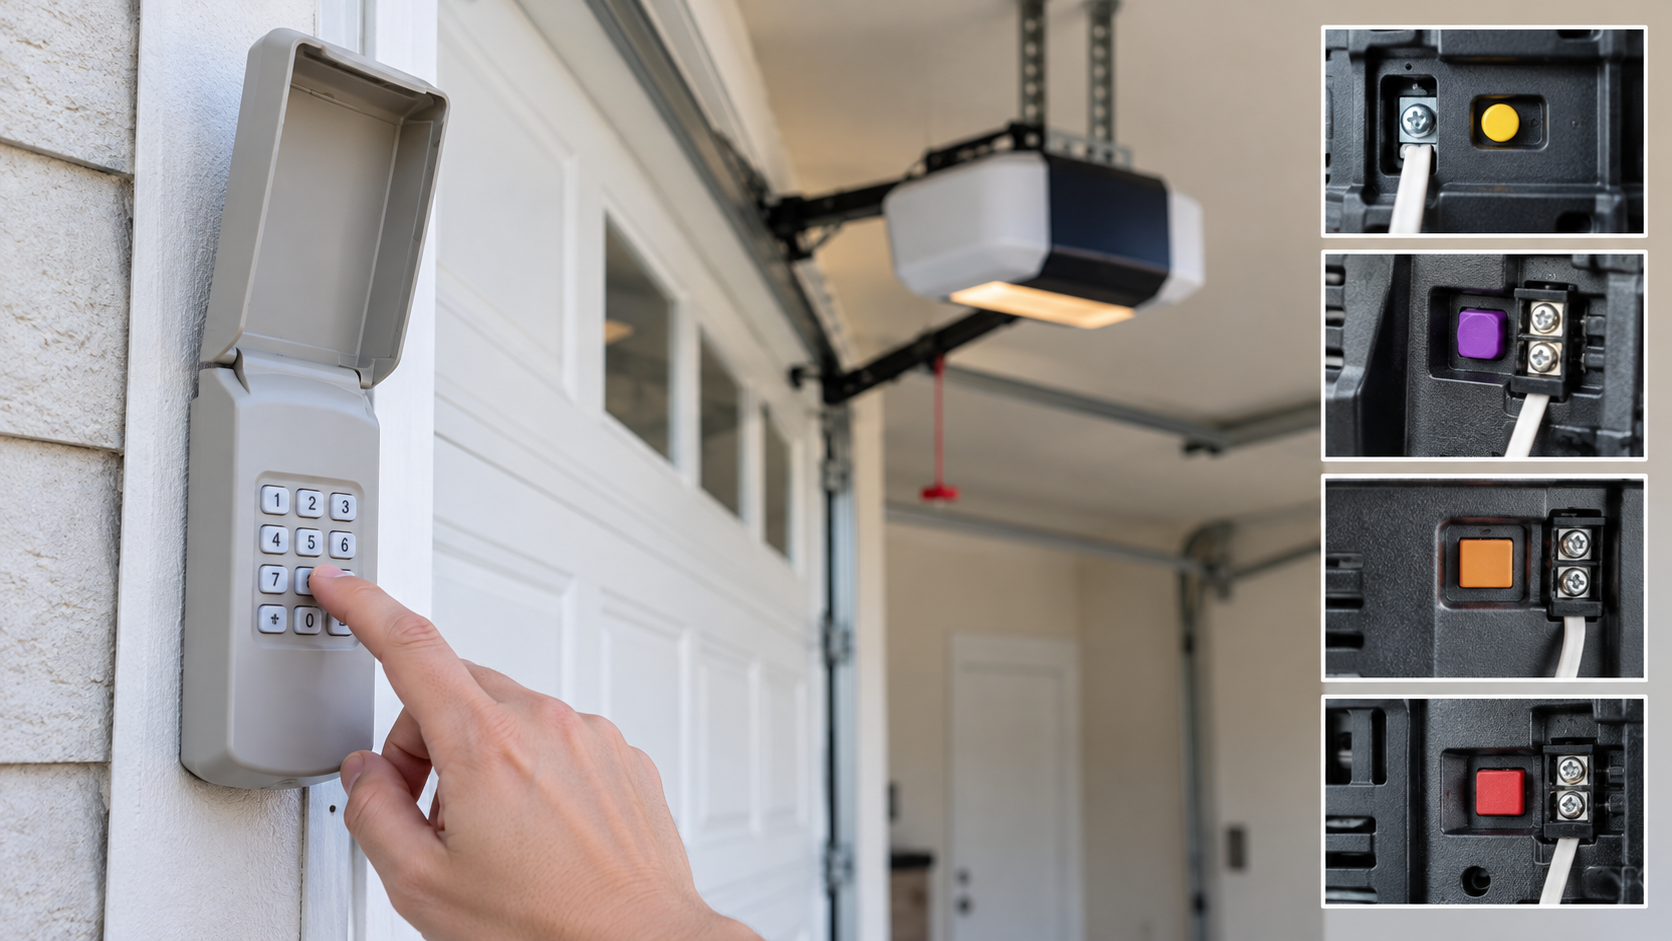
3. Check the LEARN button color
Where is the LEARN button on a LiftMaster?
On many LiftMaster openers, the LEARN button is on the back or right side of the motor unit, near the hanging antenna wire. Its exact position depends on the model.
The LEARN button is used to pair compatible remotes and keypads. On supported openers, it can also be used to erase programmed accessories.
The button color is useful when checking compatibility, but it should not be the only factor used to select a remote.
LiftMaster has supported several generations of radio technology. Use the official LiftMaster compatibility guide to match your opener with a compatible accessory.
Before continuing, make sure the garage door area is clear, the opener is receiving power, and the remote has a working battery.
How to Program a LiftMaster Garage Door Opener Remote
For many compatible remotes that support direct LEARN-button programming, the basic process is as follows.
Step-by-step instructions
- Make sure the garage door is stationary and the opening is clear.
- Locate the LEARN button on the opener’s motor unit.
- Press and immediately release the LEARN button. On supported models, its indicator LED will remain lit for approximately 30 seconds.
- Within the programming window, press and hold the button on the remote that you want to use.
- Release the remote button when the opener lights flash or you hear two clicks, as specified by the model’s instructions.
- Test the programmed remote by pressing and releasing the button.
A successful pairing should allow the remote to operate the intended garage door.
Important: Do not hold the LEARN button down for an extended period when you only intend to program a remote. On supported models, holding it until the indicator turns off can erase stored remote and keypad codes.
For the official instructions, see How to Program a Remote Control to a Garage Door Opener.
How to program a LiftMaster garage door opener remote when the standard process fails
If the remote does not pair using the basic procedure, do not repeat it indefinitely.
Check the remote model number and look up its instructions. Some accessories require a specific sequence before the opener’s LEARN button is used.
For example, the 890MAX, 893MAX, and 895MAX remote controls use a programming process in which the user first selects a setting based on the opener type. The remote is then placed into pairing mode with the garage door opener.
See the official 890MAX, 893MAX, and 895MAX programming guide for the full model-specific procedure and button-press instructions.
Programming LiftMaster MAX Remotes
The term “LiftMaster remote programming” covers several accessory generations. The MAX family is a useful example because these remotes require more than a single generic pairing sequence.
The following models have a dedicated manufacturer guide:
- 890MAX
- 893MAX
- 895MAX
How MAX remote programming works
- Press and hold the remote’s Program button until its front LED illuminates.
- Press and release the remote button the number of times specified for your opener type in the manufacturer’s chart.
- Exit programming mode using the instructions for the remote.
- Press and release the LEARN button on the opener.
- Press and hold the selected remote button within the programming window until the opener lights flash or you hear two clicks.
- Test the remote.
The exact number of remote-button presses depends on the opener type. Do not guess the sequence or substitute a sequence intended for another remote.
Programming tip: Keep the remote model number and the opener model number together when following the guide. This helps prevent confusion between similar accessories that use different procedures.
How to Program a LiftMaster Garage Door Keypad
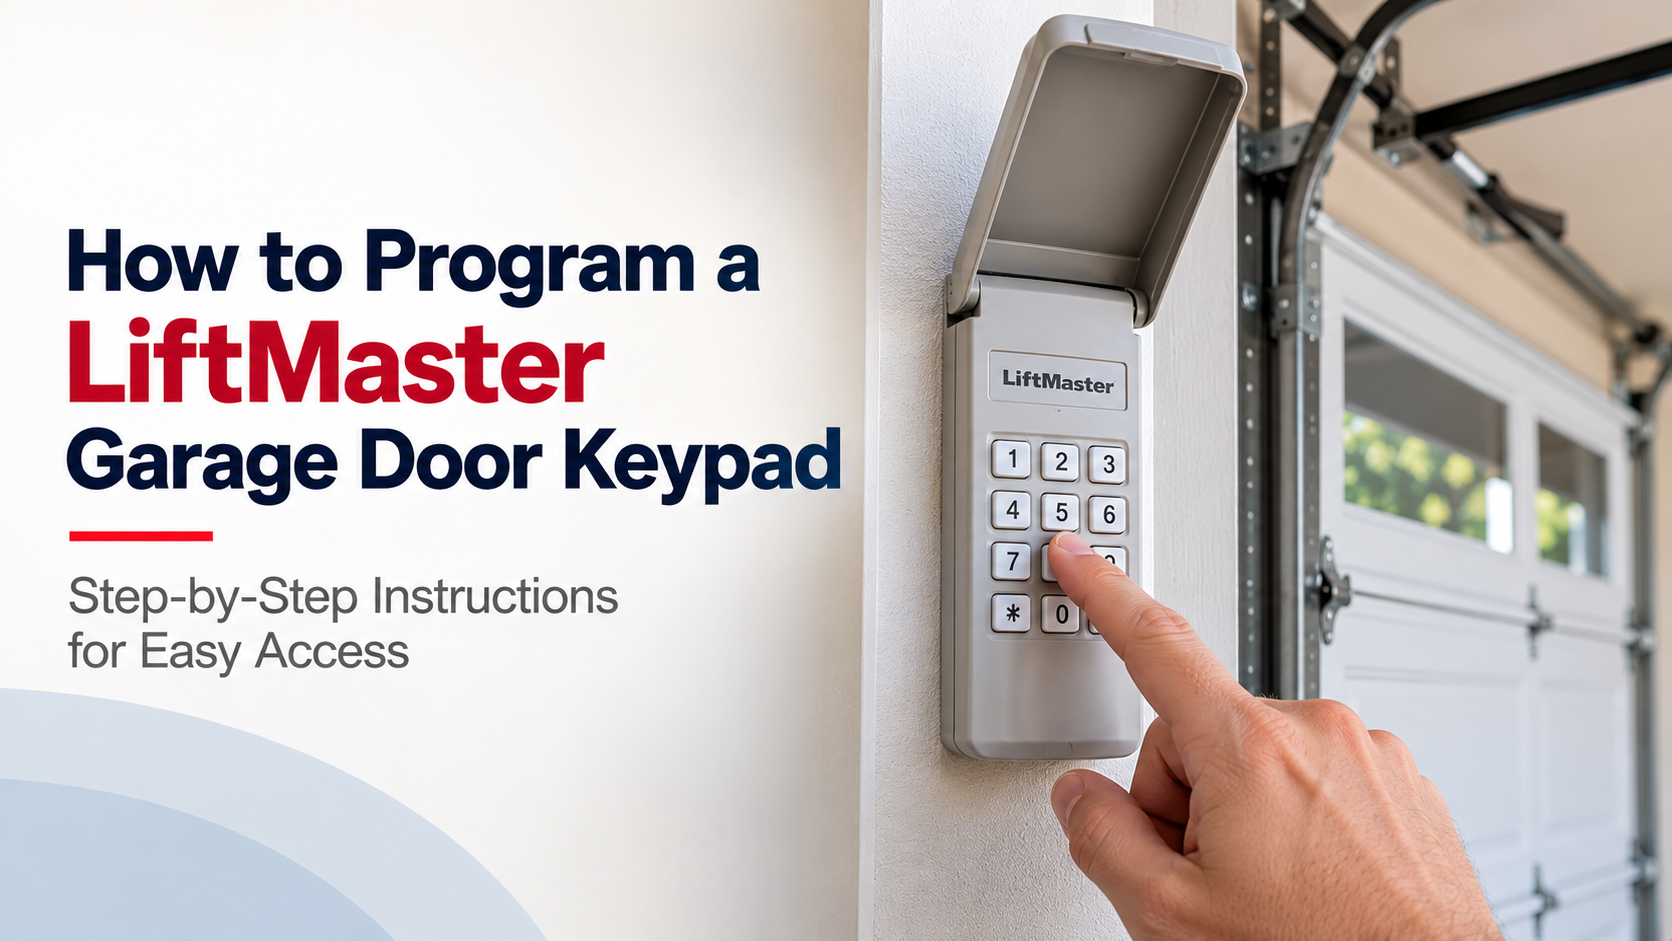
A wireless keypad lets you open the garage door by entering a personal identification number, or PIN, instead of carrying a handheld remote.
The procedure depends on the keypad model. LiftMaster has several keypads, including the 878MAX, L979M, L979S, and L979U. Their programming instructions are not identical.
How to program a LiftMaster 878MAX keypad
The following procedure applies to the manufacturer’s documented 878MAX method for an opener with a yellow LEARN button.
- Locate the LEARN button on the garage door opener.
- Press and release the LEARN button. Its indicator should illuminate.
- Enter a four-digit PIN of your choice on the keypad.
- Press and hold the keypad’s ENTER button as directed until the opener lights flash or two clicks are heard.
- Test the keypad by entering the new PIN and pressing ENTER.
If the opener uses a different LEARN button color, use the alternative procedure in the official manual. This may involve putting the keypad into programming mode, entering the PIN, selecting the opener type, and then completing the pairing process.
See the official 878MAX Wireless Keyless Entry Programming Guide for the exact procedure.
How to program a LiftMaster garage door keypad with a different LEARN button color
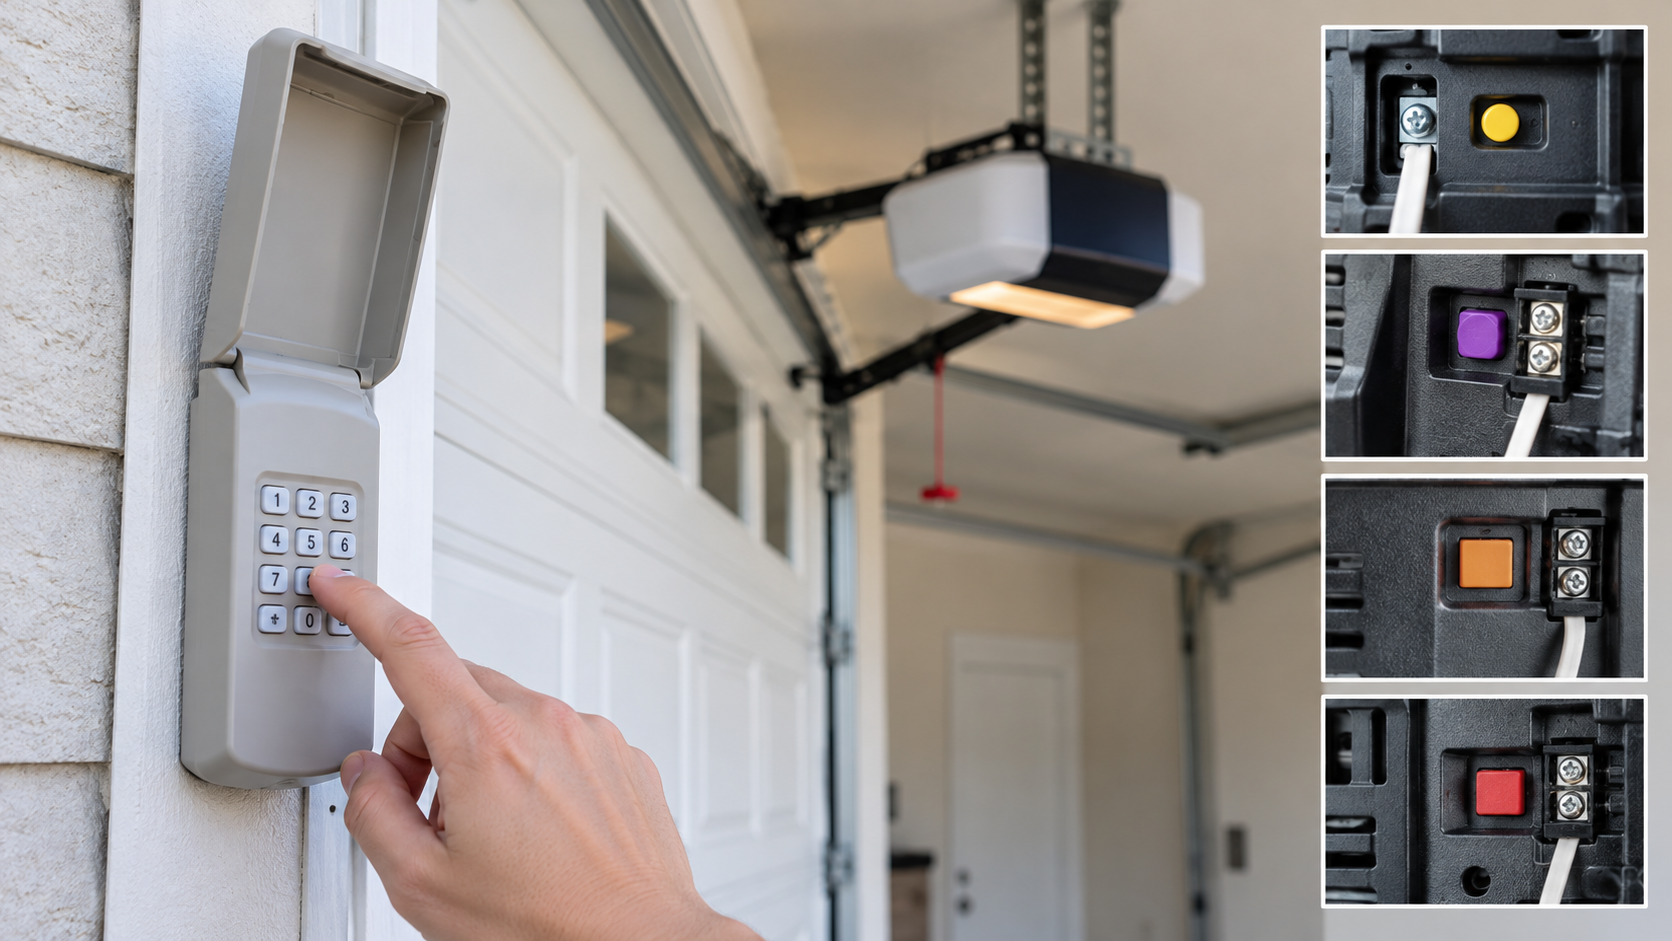 For supported 878MAX keypads paired with openers using other LEARN button colors, the manufacturer’s procedure includes additional steps.
The sequence generally involves:
- Entering the keypad’s programming mode.
- Selecting a four-digit PIN and confirming it.
- Selecting the opener type using the button sequence in the manual.
- Pressing the opener’s LEARN button.
- Entering the PIN and completing the pairing sequence.
- Testing the PIN.
The number of ENTER-button presses used to select the opener type must be taken from the correct manufacturer chart. Do not use one sequence for every opener.
For other keypad models, including newer models with QR-code setup instructions, follow the instructions supplied with that accessory.
The LiftMaster keypad programming directory provides procedures for supported keypad models.
What is the programming code for a LiftMaster keypad?
There is no single universal PIN that works for every LiftMaster keypad.
For the documented 878MAX procedure, the user chooses a four-digit PIN during setup. Other models may use a different setup sequence or have different requirements.
Do not confuse the keypad PIN with a remote-programming sequence or the opener’s internal radio technology. A PIN is the code entered by the user; the LEARN-button procedure pairs the keypad with the opener.
How to change an existing keypad PIN
If your compatible keypad supports PIN changes, use the procedure in its manual. For example, the 878MAX guide provides a separate sequence for changing an existing PIN.
Not every older opener or receiver supports every PIN-management feature. Check the model-specific manual before attempting to change the code.
How to Program Multiple LiftMaster Remotes
You can pair multiple compatible remotes with many LiftMaster openers. This is useful when several family members need access to the same garage.
How to program multiple LiftMaster remotes
- Confirm that each remote is compatible with the opener.
- Program the first remote using its model-specific procedure.
- Test the remote.
- Repeat the appropriate programming process for each additional remote.
- Test each remote individually.
The number of remotes and keypads an opener can store depends on its model and memory capacity.
Some openers may replace an older stored device when their memory is full. If adding a new remote causes an older one to stop working, check the opener’s memory-capacity documentation before assuming that the older remote is defective.
Can I program multiple remote buttons to different garage doors?
A multi-button remote may support more than one opener, provided the remote and openers are compatible. Each button must be paired according to the manufacturer’s instructions for the intended opener.
Test each button separately and make sure it operates the correct door.
How to Program a LiftMaster Car Remote Using HomeLink
Many vehicles include built-in garage door buttons through HomeLink or another vehicle-specific system. This is different from programming a handheld LiftMaster remote.
The exact process depends on the vehicle manufacturer, model year, HomeLink version, and opener technology.
General HomeLink pairing process
For vehicles that support the manufacturer’s remote-training procedure:
- Park the vehicle outside the garage with the area clear of people and objects.
- Have a working handheld remote ready.
- Position the handheld remote near the HomeLink button as instructed by the vehicle’s manual.
- Press and hold the desired HomeLink button and the corresponding handheld remote button.
- Continue until the HomeLink indicator changes to the confirmation pattern described in the instructions.
- Complete any additional rolling-code synchronization steps required by the vehicle and opener.
- Test the programmed button from a safe position.
Some vehicles require additional steps at the garage door opener’s LEARN button. Others use an infotainment screen or a different setup process. The sequence above is a general guide, not a universal procedure for every car.
For complete instructions, consult HomeLink’s official LiftMaster pairing guide.
How to Connect a LiftMaster Garage Door Opener to myQ
Programming a handheld remote and connecting an opener to myQ are two different tasks.
A handheld remote pairs directly with the opener’s radio-control system. The myQ app uses a supported connected opener or compatible accessory to provide smart monitoring and control.
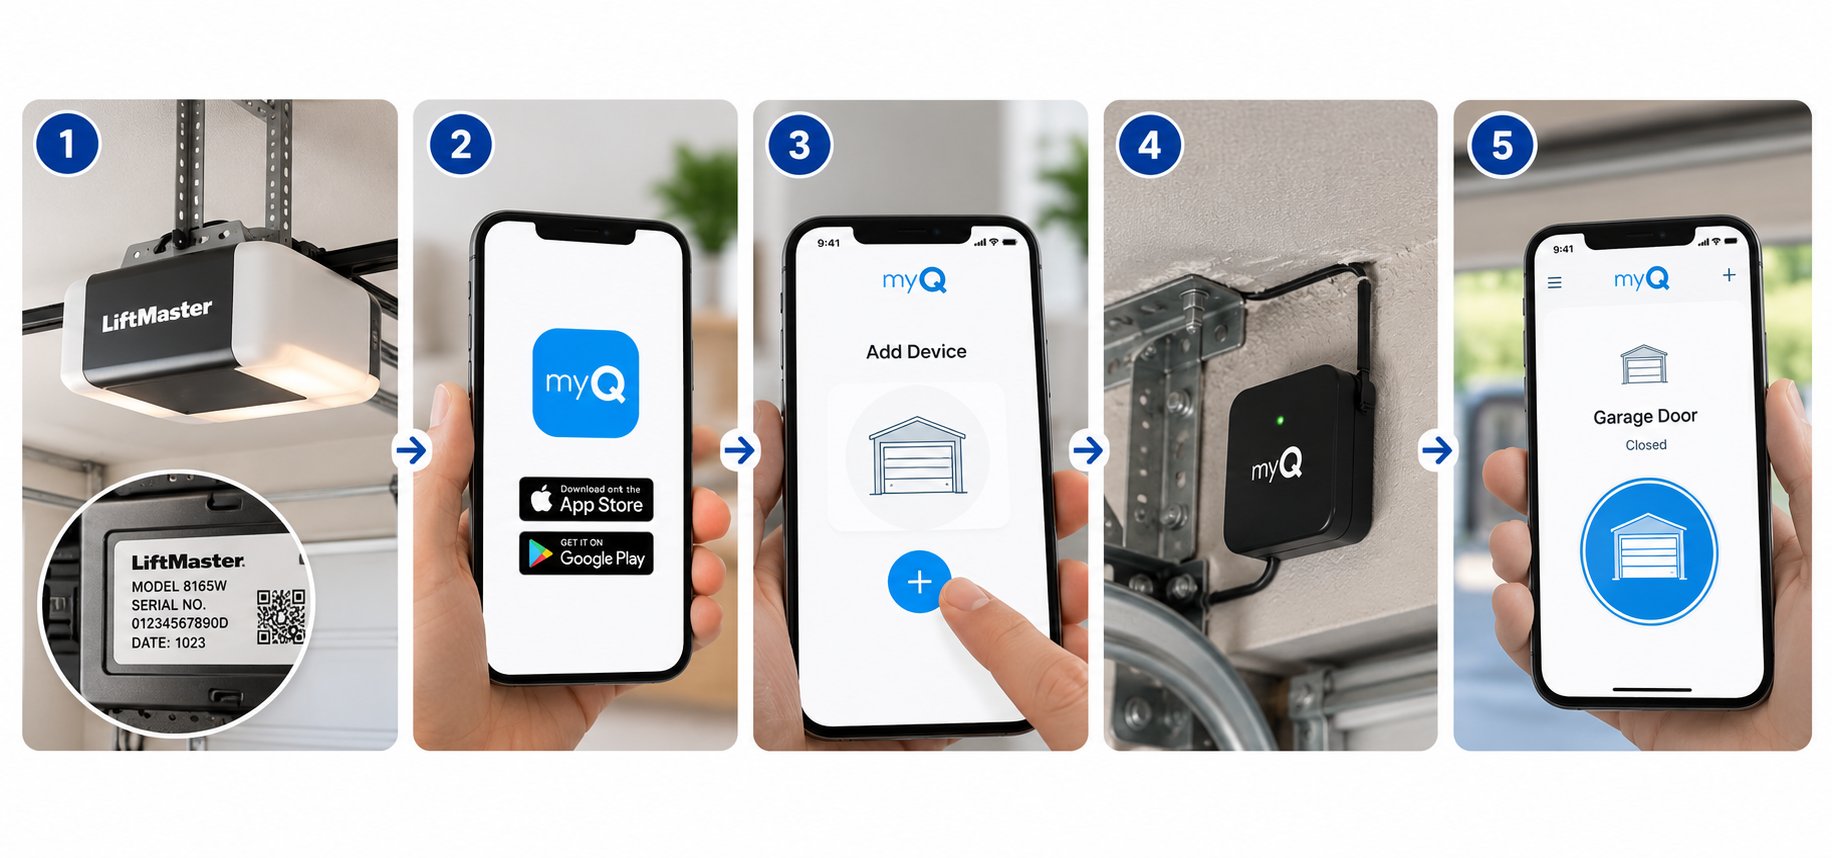
Before connecting to myQ
Check the opener’s model and connectivity features. Not every LiftMaster opener connects directly to Wi-Fi. Depending on the opener, a compatible smart garage control or another supported accessory may be required.
Also make sure you have:
- A smartphone with the myQ app installed.
- Access to your myQ account.
- Your home Wi-Fi network name and password, when required.
- A suitable Wi-Fi signal in the garage.
- An opener or accessory that is compatible with the myQ system.
General myQ setup process
- Confirm that your opener supports direct myQ connectivity or identify a compatible accessory.
- Install and open the myQ app.
- Sign in or create an account.
- Start the device setup process and select the appropriate garage door opener or accessory.
- Follow the in-app instructions to connect the device to your network.
- Complete the requested setup and verification steps.
- Test the app’s control and monitoring features.
For current device-specific instructions, use the official myQ app setup guide and the myQ compatibility and setup page.
Why Is My LiftMaster Remote Not Programming?
If your LiftMaster remote is not programming, the problem may be related to compatibility, battery condition, timing, the wrong programming sequence, or the opener’s stored-device memory.
Use the following table to identify the most likely area to investigate.
| Problem | What to Check |
|---|---|
| Remote does not pair | Verify compatibility and use the instructions for the exact remote model. |
| Learn-button LED turns off before pairing completes | Repeat the sequence and follow the timing specified in the manual. |
| Opener lights do not flash or two clicks are not heard | Check whether the button sequence and confirmation signal are correct for the model. |
| Remote battery is weak | Replace the battery with the type specified in the remote manual. |
| Keypad PIN is rejected | Verify the entered PIN and repeat the keypad's documented programming procedure. |
| One remote works but another does not | Check compatibility and test the second remote's battery and pairing sequence. |
| Remote works intermittently | Check battery condition, range, and possible radio-frequency interference. |
| Remote stops working after programming | Check whether the wrong procedure was used or whether opener memory was erased. |
| Remote works only when the opener lights are off | Consult the manufacturer's diagnostic guidance for possible bulb, control, or logic-board issues. |
LiftMaster remote not working after programming
If the remote was working previously, first check whether the opener is in lock or vacation mode, whether the battery is functioning, and whether the remote is still paired.
If several programmed remotes stop working at the same time, the problem may be with the opener or its environment rather than every remote individually.
The manufacturer’s remote troubleshooting guide provides additional checks.
Should you erase the opener's memory?
Erasing the memory should not be the first troubleshooting step. On supported openers, it removes previously programmed remote and keypad codes, meaning you will need to program the devices again.
Use memory erasure only when appropriate, such as when you have lost a remote or need to remove stored access devices. Follow the exact instructions for your model.
See the manufacturer’s guide to erasing remote controls and keypad memory.
For general symptoms such as a door that will not open or close, see Luxor’s guide to common garage door problems and repairs.
When to Contact a Garage Door Professional
Basic remote and keypad programming is manageable for many homeowners. However, persistent opener problems may indicate an issue beyond programming.
Arrange a professional inspection if:
- The opener does not respond after the correct setup process.
- Multiple controls stop working together.
- The opener has persistent diagnostic indicators or unusual electrical symptoms.
- The door is crooked, unusually heavy, or difficult to move.
- The drive mechanism makes grinding noises or appears damaged.
- The safety reversing system is not operating correctly.
Do not open the motor housing to repair internal electrical components, bypass safety sensors, or adjust high-tension springs and cables.
If programming failures are accompanied by door movement problems, it is important to distinguish an accessory issue from a fault involving the opener or the door’s mechanical system.
Luxor Garage Door Service provides opener repair, installation, and replacement services. Visit the Garage Door Openers service page to learn more or arrange a professional inspection.
Frequently Asked Questions
How do you program a LiftMaster garage door opener?
For many compatible remotes, press and release the opener’s LEARN button, then press and hold the desired remote button within the programming window until the opener confirms pairing. Some remotes require additional steps, so use the exact model’s instructions.
How do I pair a LiftMaster remote?
Identify the opener and remote models, confirm compatibility, and follow the applicable programming sequence. Test the remote after the opener signals that pairing is complete.
Where is the LEARN button on a LiftMaster opener?
It is commonly on the back or right side of the motor unit near the antenna wire. The exact location varies by model.
How do I program a LiftMaster keypad?
The procedure depends on the keypad and opener. Some supported 878MAX combinations require pressing and releasing the Learn button, entering a four-digit PIN, and pressing ENTER until the opener confirms pairing. Other combinations require additional steps.
Can I program multiple LiftMaster remotes?
Many compatible openers support multiple remotes. Program each remote according to its model-specific instructions and confirm the opener’s memory capacity.
Why is my LiftMaster remote not working after programming?
Check the remote’s battery, compatibility, programming sequence, and the opener’s lock setting. If multiple remotes fail simultaneously, further diagnosis may be needed.
Does unplugging a LiftMaster opener erase its remote programming?
No. The manufacturer’s support guidance states that remote programming is not erased simply because the opener remains unplugged. Erasing stored codes is a separate procedure.
Can I connect every LiftMaster opener to myQ?
No. Direct connectivity depends on the opener model and its features. Check the myQ compatibility tool and the instructions for your specific opener before purchasing an accessory.
Final Takeaway
Programming a LiftMaster garage door opener becomes easier once you identify the exact opener and accessory models. Remote pairing, keypad PIN setup, MAX remote programming, HomeLink pairing, and myQ setup are different processes, and each should follow the relevant manufacturer instructions.
Start with compatibility, use the correct model-specific sequence, and verify the result before changing additional settings. If programming continues to fail or the door itself behaves abnormally, professional diagnosis can help identify whether the problem involves the accessory, opener, or mechanical system.
Official References
- Remote Control Programming Overview
- General Remote Programming Guide
- 890MAX, 893MAX, and 895MAX Programming Guide
- 878MAX Keypad Programming Guide
- LiftMaster Keypad Programming Directory
- HomeLink Pairing Guide
- myQ App Setup
- Remote Troubleshooting Guide
Programming procedures change across opener and accessory models. Always verify the instructions against the manufacturer’s current documentation before following a model-specific sequence.